Creating a 3D end grain cutting board is both a science and an art. These cutting boards are known for their stunning appearance and practical advantages in the kitchen. But how are they made? What makes them so special? And why do so many chefs and home cooks prefer them over standard cutting boards? In this article, we will explore the entire process of creating a 3D end grain cutting board—from selecting the right wood to finishing it with care. This guide is written at a Year 8–9 level to make it easy for anyone to understand and enjoy.
What Is a 3D End Grain Cutting Board?
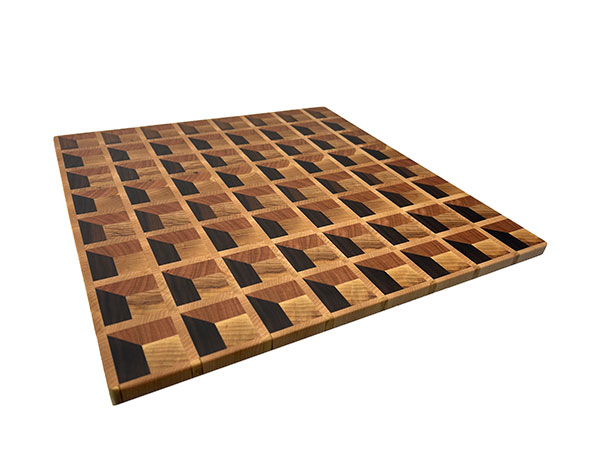
A 3D end grain cutting board is a type of wooden cutting board that uses the end grain of the wood instead of the side or edge. End grain refers to the surface that shows the rings or growth lines of the tree. When the wood is cut this way and arranged carefully, it creates a board that appears to have a 3D or cube-like design. This illusion happens because of the way light hits the different colours and grain directions of the wood.
The 3D effect is not just about looks. These cutting boards are also more durable and better for your knives. They are designed to last a long time and can even heal small cuts on their surface over time.
Choosing the Right Wood
The first and most important step in making a 3D end grain cutting board is selecting the right wood. Most makers use hardwoods because they are strong and can handle repeated cutting. Popular choices include walnut, maple, and cherry.
Each wood has its own colour:
- Walnut is dark brown and adds depth to the design.
- Maple is light cream and helps create contrast.
- Cherry has a warm reddish tone that adds richness.
To create the 3D illusion, you need woods that contrast well with each other. Using three different shades works best. The wood should also be straight, free of knots, and dry. Wet or warped wood can ruin the final result.
Designing the 3D Pattern
The 3D effect does not happen by accident. It is carefully planned using geometry. Most 3D cutting boards use a cube pattern, which means each cube has three sides showing: top, left, and right.
To get this look, woodworkers cut strips of wood at specific angles, usually 60 or 30 degrees. These strips are then arranged so that each piece forms one side of a cube. When glued together and sanded flat, the different wood colours and grain directions make the pattern look like it’s popping off the board.
This design takes patience and skill. One small mistake in measurement can make the whole pattern look wrong. That’s why drawing the pattern on paper or using computer design software before cutting the wood is helpful.
Cutting and Gluing the Pieces
After the wood pieces are planned and marked, they are cut into long strips using a table saw. Safety is very important at this stage, so woodworkers wear protective glasses and use tools carefully. Each strip must be exactly the same width and thickness to make sure the cubes fit together perfectly.
Once the strips are ready, they are arranged in a pattern and glued together. This first glue-up is called a “blank.” The blank is left to dry under pressure using clamps. After drying, the surface is planed or sanded smooth.
Then comes a second set of cuts. The board is turned and cut again into strips in the opposite direction. These new strips are rotated and flipped to match the 3D cube pattern. When arranged correctly, they create the optical illusion. These pieces are then glued together again to form the final shape.
Creating the End Grain Surface
After the second glue-up, the board now shows the end grain of the wood on its surface. This is where the board gets its strength and knife-friendly quality. The end grain surface can handle more chopping and slicing without dulling your knives. It also absorbs impact better, which means it lasts longer than other types of boards.
At this stage, the board is thicker and heavier. It is trimmed to its final size, and any uneven spots are smoothed out using a planer or a sander.
Sanding and Finishing
Once the shape is complete, the board is sanded using several grits of sandpaper. It starts with coarse grit and moves to finer grits. This helps remove any glue marks and smooth the surface. The goal is to make the board feel silky to the touch and look perfect from every angle.
The next step is finishing. A food-safe oil, like mineral oil or a mix of beeswax and oil, is applied to the board. This protects the wood from moisture and brings out the natural colors of the wood. Some makers apply several coats and let each coat soak in before adding the next one.
Finishing also helps keep the board clean. When oiled properly, the board resists water and food stains better.
Adding Details and Features
Many woodworkers add small details to improve the board. For example:
- Juice grooves can be carved into the edges to catch liquid.
- Non-slip feet can be added to the bottom to keep it steady on the counter.
- Handles or finger grips can be carved into the sides to make it easier to carry.
These features make the board not just beautiful but also very practical.
Caring for Your 3D End Grain Cutting Board
A good cutting board is an investment, so taking care of it is important. Here are a few simple tips:
- Always hand wash the board. Never put it in the dishwasher.
- Dry it right away after washing.
- Oil it once a month or when it looks dry.
- Don’t leave it soaking in water.
- Store it in a cool, dry place.
If you follow these steps, your board can last for many years and look even better as it ages.
Why Make or Buy One?
A 3D end grain cutting board is more than just a kitchen tool. It’s a work of art that adds style and elegance to your home. It shows that you care about your cooking tools and your space. Whether you make one yourself or buy one from a skilled woodworker, it’s a decision that combines beauty, function, and craftsmanship.
With the right design, wood choice, and care, a 3D end grain cutting board will be the highlight of your kitchen and a joy to use every day.